


Reach into your kit & pull out the bag that says Experiment 25. Take everything out of the bag and place it around your white mat.

Place the graduated cylinder on the center of your mat. Then grab the tube of Sucrose powder.

Fill the tube of Sucrose with cold water, exactly to the 25 mark.

Place the cap back on tight and shake it for 20 seconds to mix.

Next, set the tube of Sucrose to the side and grab the tube of Sodium Chloride. Fill it exactly to the 25 mark with cold water, recap tightly, and shake for 20 seconds to mix.

Grab the Yellow tube of Sucrose and shake it for another 10 seconds or until all of the crystals are dissolved, then pour it into the graduated cylinder.

Next, shake the red tube of Sodium Chloride until all the crystals are dissolved. Grab the bag of wood disks and drop one into the graduated cylinder.

Now using one of the pipettes, fill it with the red Sodium Chloride and slowly drip it onto the center of the wooden disk. The slower you do it, the better the liquids will stack on top of one another.

Next, rinse out one of the empty tubes and fill it to the 25 mark with cold water. Using the pipette like before, slowly drip the water onto the center of the wooden disk to layer it on top of the red color.

Now, grab the bottle of vegetable oil and gently press it against the side of the graduated cylinder and squeeze to layer it on top of the water.

For the 5th and final liquid, grab the bottle of baby oil and like before, press it against the side of the graduated cylinder and slowly squeeze to layer on top of the blue vegetable oil.

Next, scoop the wood disk out using the popsicle stick. Reach the popsicle stick down underneath the disk, and gently lift it out of the graduated cylinder.

Now let’s test the density of different objects. Start by gently dropping the alien into the liquid and watch to see how far it goes down.
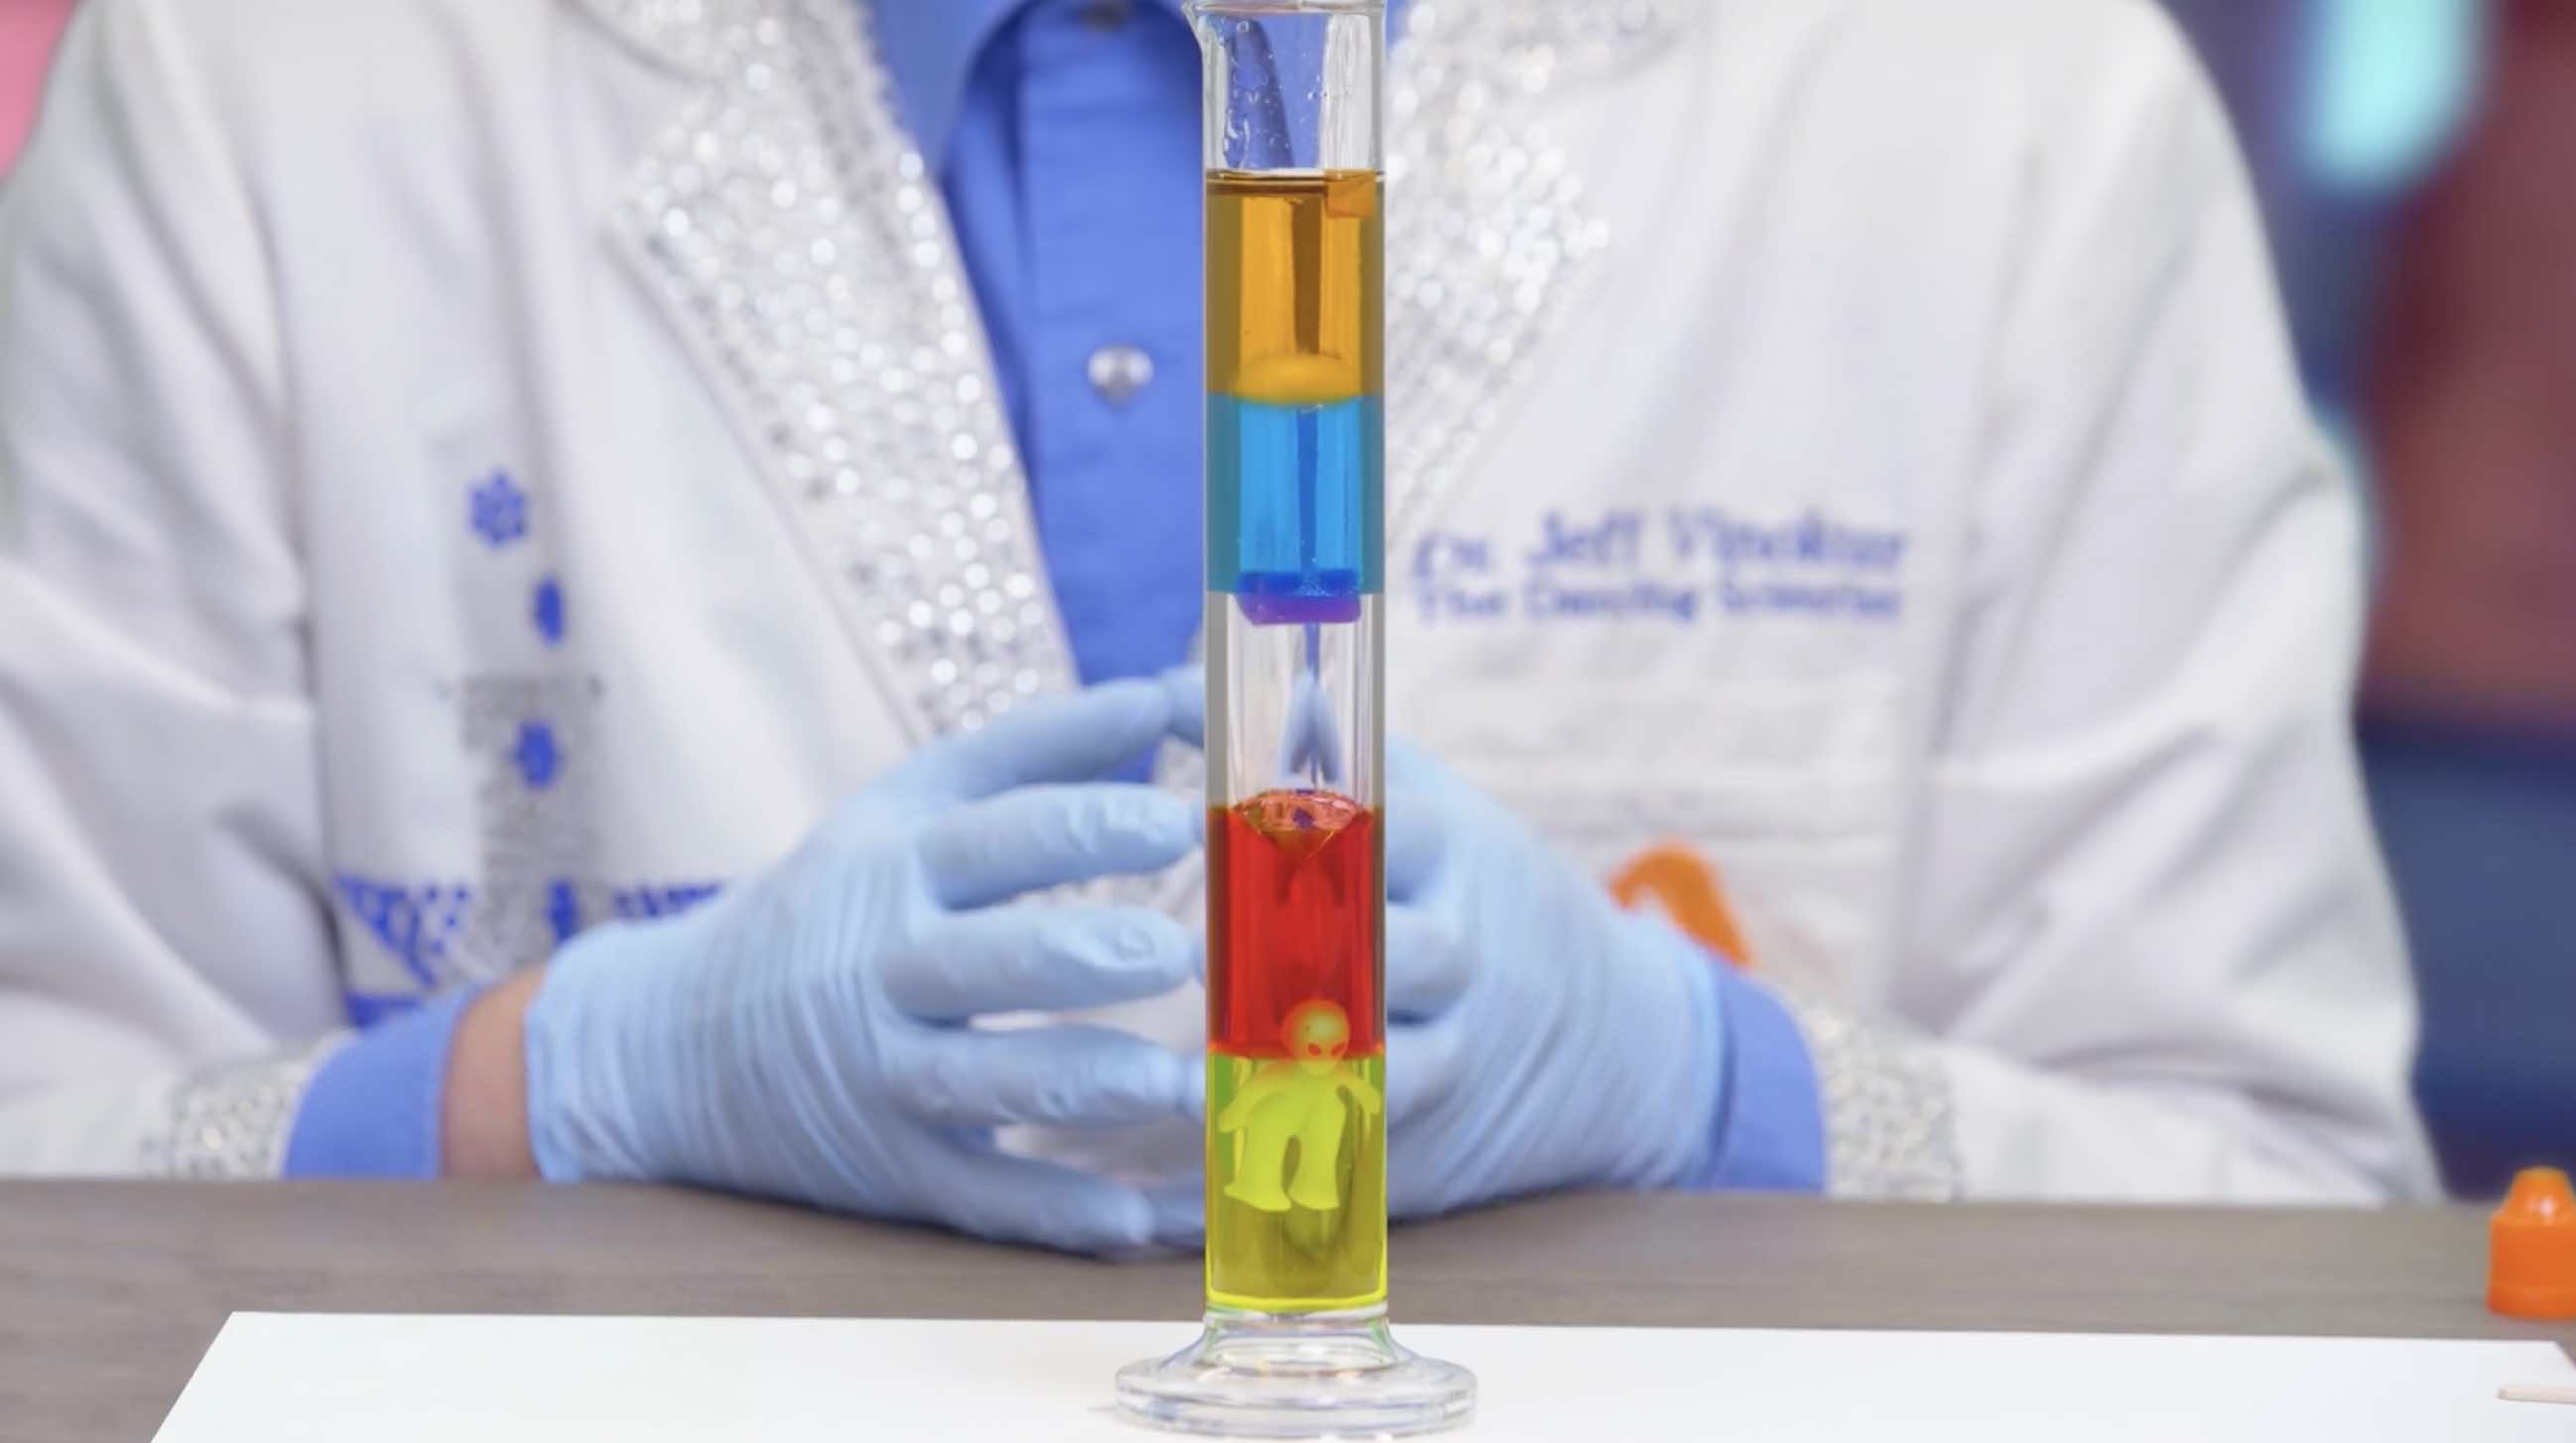
Next, drop in the diamond, followed by the piece of a hot glue stick, then the ball of plastic, and lastly the wooden cube.


Skip, I will use a 3 day free trial
Enjoy your free 30 days trial


 GENERATION GENIUS